segunda-feira, 30 de julho de 2012

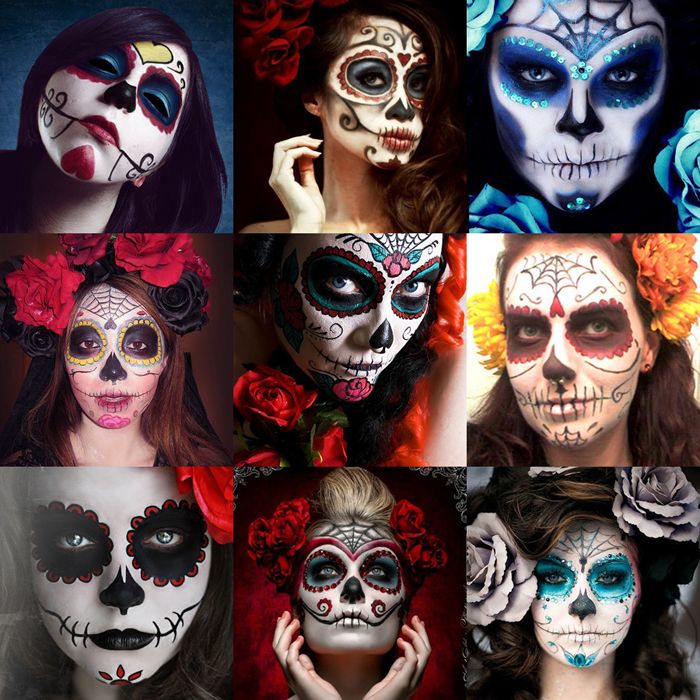
Caveira mexicana

 Minha melhor amiga, a queridíssima Flávia, vai numa festa a fantasia e quer pintar o rosto como caveira mexicana.
 Coloco aqui algumas sugestões de pintura para o rosto.


Olha como a Flávia ficou:


Arrasou amiga!!
=*

sexta-feira, 27 de julho de 2012

Dando um up na pulseira

Outro Ctrl+C  Ctrl+V desse site.


Chain, chain, chain... DIY Dannijo Cuff

Every so often, I like to pull out all the jewelry I don't wear, but collect. It's usually divided into two categories: the keep collection (vintage and antique jewelry from grandmothers and great-grandmothers) and the junk pile. As a certified hoarder (just not TLC reality show status hoarder), I can't toss the junk pile jewels, but love to reinterpret what I've got. Here's a perfect example.

The inspiration: Dannijo's mishmashed cuffs, like the Glenn, below.

www.dannijo.com

Recreating this melange of metal chain was a piece of cake with all the broken jewelry in the junk pile. 


Tools and Materials:
A base cuff (from my jewelry box)
Pliers, including one that can cut through chain
Super glue, like E-6000
Toothpicks
Paper plate, or any disposable surface for the glue
Broken jewelry, old chains, scraps of chain from leftover projects.
Paste jewelry (I wanted to have a base layer with some sparkle, like the Sabelle bracelet, which allowed me to use up my mate-less costume jewelry earrings)


First, I used my pliers to break or snip off the backs from the earrings.


Squeeze a little glue onto the plate. It's smelly, so be sure if you use it to be in a well-ventilated area. Get only a little bit of glue out before adding each piece-- if it sits out for even a few minutes it will get gummy and difficult to work with.


I used the toothpick to put glue on the bracelet, and began attaching the costume jewelry first. 


Next, came the chain. I cut sections of chain as I went, and experimented with different placements before I glued.


After my short pieces of chain were attached, I took a long chain, glued one end near the cuff's end, and began wrapping the chain around the cuff. I glued the chain down near the top and bottom edges of the cuff.


View from behind

Now, the hardest part. DO NOT TOUCH. Once I began fidgeting with it after everything was glued down, things began to come undone. The glue has to dry overnight to stay secure.


Dando um up no colar

Gostei desse post de passo a passo para reformar aquele colar cafoninha de cristais. Já vou reformar o meu.


The Odd Couple: DIY Sparkly Embroidery Thread Necklace


With the friendship bracelet trend this past summer that ran rampant like the plague, an interesting combination of materials popped up: humble embroidery floss and rhinestones. (See Frieda & Nellie)

Jolita Jewelry took it to a whole other level, with this "faux silk and vintage crystal necklace." Subtext: string and your grandma's old costume jewelry. Too easy. It's a spin on Victorian mourning jewelry, when Victorians would adorn themselves with jewelry made with the hair of a deceased loved one. I've heard of Victorian brooches and lockets containing hair... but a whole braid like this? Sheesh. 

www.bottica.com

History lesson over. Let's do it.


Tools and Materials:
Embroidery thread (I used about 9 skeins in a tonal range of pinks, coral, and fuschia)
Needle
Crystal/rhinestone necklace


I began by unwinding the skeins and making three bundles (of three skeins each), a little over three times the length of my necklace. 


I tied the ends together, keeping the bundles separate, then began braiding. You'll need to save a piece of thread about twice as long as the bundles for attaching the necklaces together later.


I continued until the braid was about 3 inches longer, on each end, from the necklace, then knotted the loose strings. I trimmed down the remaining string on each end.


Next, I lined up the necklace with the braid, and made note of where I wanted the rhinestone necklace to become attached.


I threaded up a needle with string, and tied the embroidery thread around some strings of the braid.


I used the needle to sew the thread through the braid and wrapped in between the rhinestones. At the end of the necklace, I tied off the embroidery thread and tucked in the loose ends.


I attached with jump rings a larger ring and clasp...


... and it's done!